Add Row
Add Element
cropper
update
Pleasanton Home Pro Media
update
Add Element
  • Home
  • Categories
    • Renovation
    • Doors
    • Lawns
    • HVAC
    • Painting
    • Pest Control
    • Handyman
    • Cleaning
    • Windows
    • Plumbing
    • Electrical
April 29.2025
3 Minutes Read

Mastering the Art of Cleaning a Polyester Rug: Simple Tips and Techniques

Cleaning a purple polyester rug with spray and sponge

Why Polyester Rugs Are a Popular Choice

Polyester rugs are not just fabrics thrown on the floor; they represent a blend of comfort, style, and practicality. Known for their stain-resistant properties and excellent affordability, these rugs have found their way into many households across the country. Polyester materials are designed to withstand heavy foot traffic without significant fading, thus making them perfect for busy homes. With proper care, these rugs can maintain their soothing colors and soft textures for years.

Essential Tools for Cleaning Your Polyester Rug

Before diving into cleaning methods, it’s crucial to have the right tools at your disposal. A vacuum cleaner fitted with the appropriate brush and attachment is indispensable for removing dirt and dust. Additionally, a gentle dry shampoo specifically designed for fabrics can refresh the rug’s fibers, while a steam cleaner might come in handy for a deeper cleanse. Having a beater or a simple broom is also beneficial for the initial shake-off of embedded dust. Safety equipment, such as masks and goggles, should not be overlooked to protect you during the cleaning process.

Simple Yet Effective Cleaning Methods

When it comes to maintaining your polyester rug, there are several tried-and-true methods to ensure it stays looking vibrant and fresh:

Shaking off the Dust

The simplest method of cleaning a small polyester rug is to give it a good shake. This nostalgic technique, reminiscent of how our ancestors would take care of their carpets, effectively removes surface dust and debris. Just make sure to hang it safely, and if possible, do this outdoors to prevent dust from settling back into your home.

Vacuum Regularly

A vacuum cleaner is your best friend when it comes to keeping your rug clean. Aim to vacuum at least once a week to prevent dust and dirt from embedding themselves into the fabric. Use gentle suction to avoid damaging the fibers, particularly when dealing with thicker rugs.

Using Dry Shampoo

Incorporating a fabric dry shampoo into your routine can help absorb oils and smudges on your rug's surface. Simply sprinkle it over the rug, let it sit for a period as per product instructions, and vacuum it up. This method works wonders in keeping the fibers fresh and clean without much hassle.

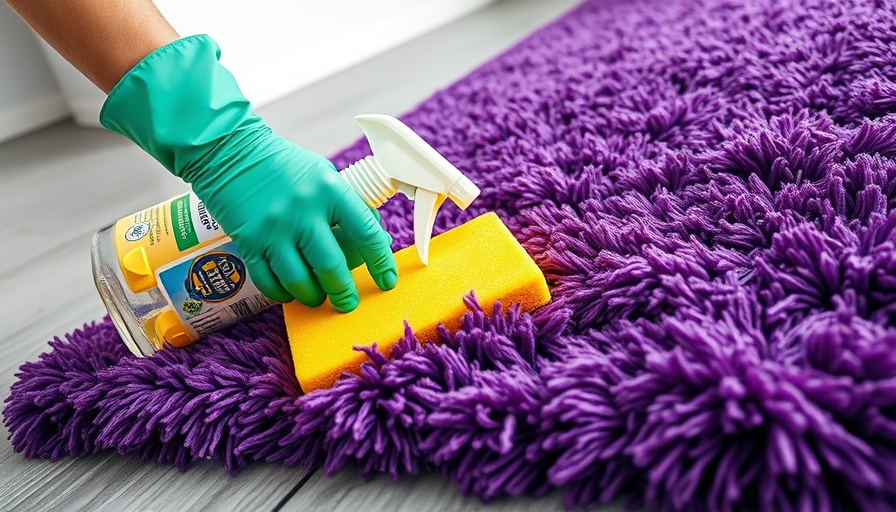
Spot Treating Stains

For unexpected spills or stains, quick action is essential. Blot the stain with a clean cloth immediately; don’t rub as that may spread the stain further. Then apply a suitable stain remover to minimize the damage and clean the affected area gently. Always refer to the cleaner's instructions, and test it on a small, inconspicuous area to ensure it doesn’t alter the rug's colors.

Steam Cleaning

Lastly, steam cleaning can provide a deep clean while revitalizing the polyester fibers. This method is particularly effective for heavy-duty cleaning, as it uses heat to eliminate stubborn stains and bacteria.

Problems You Might Encounter

Despite their durability, polyester rugs can pose some challenges. Over time, they may accumulate dirt that, if regularly unaddressed, can lead to permanently embedded stains. Additionally, if exposed to direct sunlight for prolonged periods, fading may occur, ultimately diminishing their aesthetic appeal. Regular maintenance is your best defense against these common issues.

Embrace the Care

In summary, polyester rugs are a fantastic addition to any home when maintained properly. Knowing how to clean them effectively ensures their longevity and appearance. Embrace the act of caring for your rug, much like an old family tradition, and appreciate the transformation it brings to your living space.

So why wait? Your polyester rug deserves love and attention—give it the cleaning it needs to keep looking fresh and inviting!

Cleaning

7 Views

0 Comments

Write A Comment

*
*
Related Posts All Posts
07.28.2025

Discover 15 Easy Homemade Milk Bath Recipes for Soft Skin

Update Transform Your Skin Naturally: The Beauty of Milk Baths Are you tired of dealing with rough, dry skin? If so, it might be time to embrace the comforting luxury of a milk bath. Known for their ability to soften and moisturize, milk baths can easily be prepared at home with just a handful of ingredients. Part of the appeal of these baths lies not just in their soothing properties, but also in their capacity to protect against skin irritations, making them an essential addition to your wellness routine. Understanding the Benefits of Milk Baths Milk baths offer an impressive range of benefits. The lactic acid in milk acts as a gentle exfoliant which helps to remove dead skin cells, leaving the skin soft and rejuvenated. This simple remedy can also help protect your skin from various maladies, including eczema, rashes, and sunburn. Moreover, they provide a relaxing experience that eases tired muscles. By adding special ingredients, you can tailor the bath to not only soothe the skin but also tackle any specific concerns. 15 Easy Homemade Milk Bath Recipes Let’s explore some delightful milk bath recipes that you can easily whip up at home, enhancing your self-care routine while keeping your skin looking impeccable. Coconut Oil Milk Bath This gentle and hydrating recipe pairs baking soda with coconut oil and powdered milk to rejuvenate your skin. Ingredients: Baking soda: 1/2 cup Coconut oil: 15 – 20 drops Powdered milk: 1 ½ cup Instructions: Mix the baking soda and coconut oil in a bowl until well combined. Add the powdered milk, blend thoroughly, and store in an airtight container. Use about 1 cup of this mixture for each bath. Vanilla, Rose, and Salt Milk Bath This recipe is perfect for a fragrant and indulgent soak, combining calming ingredients that work together to nourish the skin. Ingredients: Baking soda: 1 cup Citric acid: ½ cup Corn Starch: ¼ cup Powdered buttermilk: ½ cup Bentonite Clay: 1/3 cup Colloidal Oatmeal: 1/3 cup Titanium dioxide: 1 tablespoon Cocoa Butter: 1.5 tablespoon Shea Butter: 1.5 tablespoon Fragrance oil: 3 tablespoon Vanilla: 5 – 6 drops Oats: 1 tablespoon Rose petals: 1 tablespoon Instructions: Combine all dry ingredients in a bowl, then slowly mix in wet ingredients. Add the oats and rose petals. Stir until the mixture is smooth, then store in an airtight container, using as desired. Historical Context: The Tradition of Milk Baths Historically, milk baths have been associated with beauty and luxury as far back as ancient civilizations. Cleopatra, famed for her beauty, was known to bathe in milk to maintain her youthful complexion. By understanding this legacy, we can appreciate that milk baths are not a modern trend, but a time-honored practice that aligns with a holistic approach to wellness and self-care. Common Myths and Misconceptions About Milk Baths Many people might think that milk baths are only for those with luxurious lifestyles or that they are overly complex to prepare. This couldn’t be further from the truth. Milk baths are simple, accessible, and can be customized to fit any budget or personal need, making them a feasible option for anyone eager to elevate their skincare routine. Emotional and Human Interest Angle: A Soothing Escape In our fast-paced modern world, finding time for self-care can be difficult. Milk baths provide a serene escape, a moment to slow down and indulge in a calming ritual. Just picture yourself slipping into the warm water, surrounded by soothing scents. Not only does this ritual beautify your skin, but it also nourishes your mental well-being, prompting you to take time for yourself amidst life’s demands. Practical Tips for Enhancing Your Milk Bath Experience Maximizing your milk bath experience goes beyond just adding ingredients. Consider lighting some candles, playing your favorite music, and perhaps enjoying a book during your soak. These elements create a tranquil environment that elevates your relaxation time, transforming your bath into a mini sanctuary. Conclusion: Embrace the Luxury of Milk Baths As you delve into these 15 homemade milk bath recipes, remember that the beauty of self-care lies in the experience. So go ahead, indulge in a milk bath; your skin will thank you, and so will your well-being. Join the tradition of nurturing yourself in a way that has been cherished for generations. If you love the idea of a milk bath but want to maximize its benefits, explore different ingredients and make the recipes your own. Take a moment for yourself; you deserve it!

07.18.2025

Discover How to Remove Hard Water Stains from Your Toilet Easily

Update Unlocking the Secrets of Hard Water Stains Hard water stains can be a frustrating headache for homeowners, especially when they settle in toilets, making them look dirty and neglected. These stains not only affect the appearance of your bathroom but can also lead to more significant plumbing issues over time. In this article, we’ll unveil effective strategies to remove hard water stains and restore your toilet’s cleanliness without the hassle of expensive chemicals. Understanding Hard Water Stains Hard water contains high levels of minerals like calcium and magnesium, which leave deposits as water evaporates. These deposits can develop into stains, often appearing as brown or rusty marks in your toilet. Knowing how to address these stains is crucial not just for aesthetics but also for the longevity of your fixtures. Eco-Friendly Solutions to Remove Stains You don’t need to resort to harsh chemicals to tackle stubborn stains. Here are five eco-friendly tips that can help you keep your toilet clean and fresh: 1. Cleaning with White Vinegar Materials needed: White vinegar, toilet brush, pumice stone White vinegar is a powerhouse when it comes to cutting through hard water stains. Start by removing excess water from the toilet bowl with a plunger and drying the area with paper towels. Then, pour vinegar around the bowl, spreading it into hard-to-reach places. Allow it to sit overnight before scrubbing with a toilet brush. For particularly stubborn stains, a pumice stone can be used cautiously to avoid scratching. 2. Baking Soda and Vinegar Combo Ingredient ratios: 1 cup baking soda, 3 cups vinegar This mixture creates a fizzing reaction that can help lift stains. First, pour a cup of white vinegar into the bowl. After a minute, add a cup of baking soda and two additional cups of vinegar. Let it fizz for about 10 minutes before scrubbing the stains away with the toilet brush. This method is not just good for the toilet but can also clean any hard water stains on your bathroom tiles. 3. Borax Toilet Cleaner Ingredients: 3/4 cup Borax, 1 cup white vinegar, drops of essential oils Combining Borax with vinegar offers a powerful cleaning solution. Sprinkle Borax into the toilet bowl, followed by pouring in vinegar. Add a few drops of lavender or lemon oil for a fresh scent. Let this mixture sit for at least 30 minutes, scrub the bowl, and flush for a sparkling toilet. 4. Coca-Cola Magic Believe it or not, Coca-Cola can be an unexpected yet effective cleaner for hard water stains due to its acidity. Pour a can directly into the toilet bowl and leave it for about two hours. Scrub the bowl with a toilet brush, then flush. This method can be surprisingly effective! 5. The Pumice Stone Approach A pumice stone can be your best friend when it comes to stubborn stains. Wet the pumice stone and gently rub it directly against the stains. The porous nature of the stone allows it to lift the stains without scraping the porcelain. Maintaining Your Toilet for Prevention Once you’ve conquered those hard water stains, regular maintenance is essential to prevent their return. Here are a few prevention tips: Regularly clean with vinegar weekly to prevent mineral buildup. Consider installing a water softener to reduce hard water issues overall. Make it a habit to flush the toilet and check for stains after each use. Community Wisdom: Stories & Tips Local homeowners often have ingenious tricks up their sleeves. From using essential oils mixed with natural cleaners to DIY toilet bombs that prevent buildup, community members share their successful stain-removal experiences online and at neighborhood forums. Engaging with your local community can yield valuable tips that elevate your home care game. By embracing these simple yet efficient cleaning methods, you can transform your toilet from stained to spotless, making each visit to the bathroom a pleasant experience. Invest a little time today for lasting benefits! Call to Action: Now that you know how to tackle hard water stains, take action today and try one of these methods to keep your bathroom looking pristine. Your toilet—and your home—deserve the best!

05.27.2025

Say Goodbye to Haze on Engineered Hardwood Floors Today!

Update The Quick Fix: Understanding the Haze on Your Floors Engineered hardwood floors are elegant, combining beauty with durability. However, many homeowners face the frustrating issue of unsightly haze, diminishing their shine and charm. This article aims to demystify the causes of this problem and provide practical solutions to restore your beloved flooring. Identifying the Causes of Haze Understanding the underlying reasons for the haze on your engineered hardwood floors is key to preventing it in the future. The issue often arises from improper cleaning methods and products. Here are the most common culprits: Inappropriate Cleaning Solutions: Not all cleaning products are suitable for engineered wood. Using solutions that contain wax or harsh chemicals can lead to a dullng film on the surface. It's crucial to choose cleaners specifically designed for hardwood surfaces. Excessive Water Exposure: One mistake many make is assuming engineered wood is waterproof. Over-wetting your floors or using steam cleaners can lead to water damage, creating haze. It's advisable to use minimal moisture when cleaning. Improper Floor Finishing: If the finish is applied incorrectly, it can trap moisture and dirt, leading to haze. Waiting for each layer of finish to dry completely before applying the next is essential. Overuse of Cleaning Products: Too much of a good thing can be detrimental. Using excessive quantities of cleaner can leave residues that cause haze. A little goes a long way; in fact, one treatment with a quality cleaner per week should suffice. Effective Methods to Remove Haze Armed with knowledge about the causes of haze, let’s explore effective solutions to restore your engineered hardwood floors. Here are some actionable steps you can take: Use Vinegar Solutions: A mixture of vinegar and water (in the right proportions) can effectively cut through the haze. Vinegar is a natural cleaner that helps restore shine without leaving harmful residues. Opt for Product-Specific Cleaners: Invest in a cleaner specifically formulated for engineered hardwood. Products like Bona can be effective while being gentle on your floors. Regular Maintenance: Establish a routine that includes regular vacuuming and occasional cleaning to avoid the buildup of dirt and grime, which can lead to haze. Consider Professional Help: If you’re unsure or the haze persists, consulting with a flooring professional can offer tailored solutions. They can identify the root cause and make recommendations best suited for your flooring type. Preventing Future Haze: Essential Tips Once you’ve tackled the haze, protecting your floors is essential. Here are some practical tips: Choose Your Cleaners Wisely: Always read labels before using cleaning products. Look for pH-neutral formulations to protect your finish. Avoid Over-Wetting: Keep a damp mop or cloth instead of soaking the floors. Wring out excess water and clean in sections to allow for quick drying. Educate Your Family: If you live with others, educate them on the best practices to maintain your engineered hardwood floors properly. Conclusion: Enjoy Your Floors Maintaining the beauty of your engineered hardwood floors doesn’t have to be challenging. By understanding the causes of haze and knowing how to address them, you’ll keep your floors looking their best. If you’ve enjoyed reading this, visit your local home maintenance store to explore specialized cleaning solutions—they're just a shopping trip away!

Terms of Service

Privacy Policy

Core Modal Title

Sorry, no results found

You Might Find These Articles Interesting

T
Please Check Your Email
We Will Be Following Up Shortly
*
*
*