Add Row
Add Element
cropper
update
Pleasanton Home Pro Media
update
Add Element
  • Home
  • Categories
    • Renovation
    • Doors
    • Lawns
    • HVAC
    • Painting
    • Pest Control
    • Handyman
    • Cleaning
    • Windows
    • Plumbing
    • Electrical
May 20.2025
3 Minutes Read

Master the Art of DIY: How to Build Your Own Shower Pan

DIY shower pan construction with steel mesh and drain.

Building Your Dream Shower Pan: A DIY Journey

Creating a personalized shower pan can offer both functionality and aesthetic appeal, making it a worthwhile DIY project for homeowners. By constructing your own shower pan, you gain the freedom to customize dimensions and materials to fit your unique space. This article will guide you through the steps to building a water-resistant and stylish shower pan tailored to your needs.

Understanding Shower Pans: The Foundations

Shower pans, often referred to as shower bases or floors, serve as the foundation of any shower structure. Traditionally, many people opt for factory-made polyurethane or fiberglass shower pans due to their convenience. However, for those adventurous enough to take the DIY route, crafting your shower pan allows for greater creativity and adaptability, ensuring a perfect fit for your bathroom.

The Essential Layering Process: Step by Step

Constructing a shower pan revolves around a tiered structure, primarily involving mortar layers and waterproofing materials.

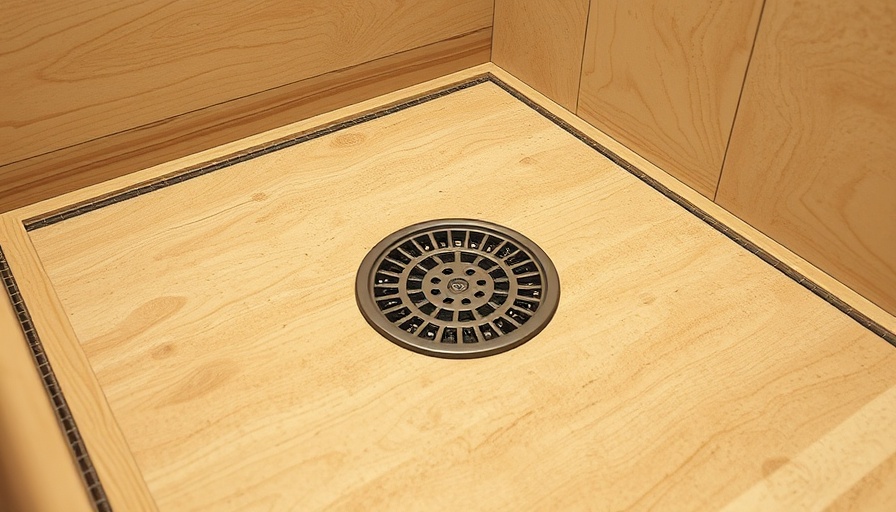
1. Pre-slope Construction: Start with a mortar base set on tar paper, creating an initial slope for the water to circulate towards the drain.

2. Waterproofing: Add a waterproof liner (typically made from PVC or a polymer) over the pre-slope to protect the subfloor from moisture damage.

3. Final Slope Layer: Above the waterproof layer, a second layer of mortar is placed, mirroring the contours of the pre-slope. This ensures a continuous slope towards the drain.

4. Tile Installation: The top layer features tiling, secured in a thin layer of mortar and grouted to finish. Tiles can range from traditional ceramic to modern porcelain, offering a plethora of design choices.

The Curb: An Important Element

A critical element of your DIY shower pan is the curb, which serves as the barrier between your shower and the rest of the bathroom. Typically between 2-3 inches high, the curb prevents water from spilling out while offering a smooth entry into the shower.

Tools and Materials: What You Need for Success

Gathering the right tools and materials is essential for a successful shower pan installation. Here’s a list to help you prepare:

  • Circular Saw
  • Tile of your choice
  • Nails
  • Mortar
  • Tar Paper
  • Chalk
  • Measuring Tape
  • Hammer
  • Utility Knife
  • Duct Tape
  • Mixing Tray for Mortar
  • Water
  • Garden Hoe
  • Flat Trowel
  • Level
  • Shower Liner
  • Silicone Sealant
  • Cloth
  • Dry Mop
  • Thinset for Tile
  • Tile Spacers
  • Large Bucket

Framing Your Shower Pan: A Clear Approach

The framing of your shower pan is critical to ensure long-lasting stability. Begin by measuring the space between your wall studs, then cut your 2x6 boards to fit the dimensions needed while allowing space for the curb. Secure these boards to the subfloor using nails, making sure they are properly aligned.

Next, cover the subfloor with tar paper to protect it from moisture. Tar paper should be laid flat and secured at intervals, ensuring overlaps measure at least 2 inches to prevent leaks.

Future Trends and Innovations in DIY Bathroom Renovations

As DIY renovations grow in popularity, innovative materials and techniques are becoming available. Homeowners increasingly embrace sustainable options, integrating eco-friendly materials and energy-efficient solutions into their bathroom designs. Consider what modern products or technologies might offer you better durability or aesthetic appeal, as renovations increasingly focus on sustainability and functionality.

Summary: Embark on Your Shower Pan Adventure

The journey of building your shower pan is not merely utilitarian; it can be an enriching experience, showcasing your personal style and enhancing your bathroom's functionality. Armed with the right knowledge and tools, take the plunge into this DIY adventure and transform your space.

A DIY shower pan not only saves money but ultimately becomes a personalized retreat within your home. So gather your tools, unleash your creativity, and get started on building your dream shower today!

Renovation

7 Views

0 Comments

Write A Comment

*
*
Related Posts All Posts
10.17.2025

Unraveling Hardwood Floor Underlayment Options: Your Essential Guide

Update Choosing the Right Hardwood Floor Underlayment When it comes to installing hardwood floors, selecting the right underlayment is crucial for a long-lasting, comfortable experience. Many homeowners feel overwhelmed by the myriad options available in the market, each boasting unique features and benefits. This guide aims to simplify that decision-making process, allowing you to create the ideal foundation for your living space. What is Hardwood Floor Underlayment and Why is it Important? Hardwood floor underlayment serves two primary purposes: it acts as a moisture barrier and provides cushioning. Depending on your floor type and subfloor condition, the right underlayment can enhance comfort underfoot, reduce sound transmission, and protect against moisture damage. With the variety of underlayment options available, understanding their specifications and uses is essential. Top Underlayment Choices for Hardwood Floors Here’s a breakdown of some of the top underlayment choices, focusing on their unique advantages: 1. TrafficMASTER Polyethylene Foam - The Budget-Friendly Choice This lightweight and flexible underlayment provides a solid foundation for hardwood floors while being easy on your wallet. At just 2 millimeters thick, it has a self-adhesive strip that simplifies installation. Its moisture barrier properties make it suitable for various locations in your home. 2. Roberts AirGuard Floor Underlayment - Best for Laminate Known for its durability and cushioning, the Roberts AirGuard is a standout for laminate flooring installations. Its thin design ensures it won’t rip easily, providing a stable and comfortable walking experience, even on radiant heated floors. 3. DUROCK Cement Backer Board - Ideal for Tile For those looking to install tile floors, the DUROCK Cement Board presents an optimal solution. With thickness options between 0.25 to 0.50 inches, it combats moisture and mildew, making it ideal for laundry rooms and kitchens. 4. Eco Cork Foam Premium Underlayment - Best for Concrete This waterproof underlayment offers antimicrobial features, discouraging bacteria growth in high-traffic areas. With a thickness of 3.2 millimeters, the Eco Cork Foam is perfect for basements or family rooms where moisture could be a concern. 5. DMX 1 Step 2.0 Underlayment - Best for Vinyl If vinyl planks are on your installation list, the DMX underlayment is integral to ensuring moisture and heat protection. Its dimples aid in adhesion to any subfloor, making it versatile for engineered hardwood as well. Understanding the Installation Process While selecting the right underlayment is half the battle, ensuring correct installation is key to your flooring’s performance. Here are some tips: Ensure your subfloor is clean and dry before installation. Follow the manufacturer instructions regarding the laying down of underlayment to prevent issues down the line. Use flooring spacers to maintain necessary expansion gaps. Final Thoughts on Hardwood Floor Underlayment The right underlayment can make a significant difference in the longevity and comfort of your hardwood flooring. By exploring your options and understanding the benefits they offer, you can confidently make a choice that suits your home. Whether you go with TrafficMASTER for affordability or opt for Eco Cork Foam for its added antimicrobial feature, knowing your options puts you on the path to beautiful flooring. Call to Action Ready to take the next step in your flooring project? Visit your local home improvement store to explore these underlayment options firsthand and consult with knowledgeable staff who can assist you in making the best choice for your unique situation.

10.14.2025

Finding the Ideal Kitchen Cabinet Height for Your Space

Update Understanding Kitchen Cabinet Heights: A Practical Guide Are you thinking about updating your kitchen? One detail that can truly elevate your kitchen's design and functionality is the height of your cabinets. Many people focus on the aesthetics of their kitchen but often overlook how crucial it is to have the correct cabinet height. When planning your remodel, understanding the ideal kitchen cabinet height is essential to achieve both style and convenience. What Is the Standard Kitchen Cabinet Height? The conventional height for upper kitchen cabinets is approximately 54 inches from the ground to their bottom edge. This height is determined by adding the base cabinet height, which typically stands at 34.5 inches, the standard countertop height of 1.5 inches, and the backsplash height of 18 inches. Achieving this balance allows not only for an appealing design but also provides ease of accessibility without the need for stools or chairs. Factors That Affect Kitchen Cabinet Heights Several factors will influence how high you should install your kitchen cabinets. Let’s take a closer look at the primary considerations: 1. Base Cabinet Height The height of your base cabinets plays a pivotal role in the overall height of your upper cabinets. If you have taller base cabinets, your upper cabinets will need to be higher as well to maintain an eye-pleasing proportion. For kitchens with 9-foot ceilings, opting for 42-inch wall cabinets is common, providing a neat finish with room for crown molding. 2. Countertop Thickness Another crucial factor is the thickness of your countertop, which can vary. It's important to ensure that there is adequate space between the upper cabinets and the countertop. A gap of about a half-inch should be intentional; ignoring this space might lead to unwelcome kitchen mishaps. 3. Cooking Range Considerations Safety is paramount; hence, maintaining proper spacing between your cabinets and cooking range is critical. The height should be sufficient to prevent the risk of fire hazards while cooking. Install cabinets with a mindful distance above stoves to ensure safety. 4. Backsplash Preferences Many opt for a backsplash above their countertops, typically standard at 18 inches high. However, it can be adjusted between 15 to 20 inches depending on personal choice and kitchen design aesthetics. 5. User Needs Lastly, the specific requirements of your household members should guide the height choices. Whether you have children who need lower access or taller adults requiring higher installations, adjusting the height to meet the needs of your family will greatly enhance functionality. Benefits of Getting the Height Right Choosing the right height for your cabinets is crucial beyond aesthetics; it directly impacts the usability of your kitchen. Here are some benefits of correct kitchen cabinet heights: Improved Accessibility: Avoid straining yourself by setting cabinets at a comfortable height. Enhanced Visual Appeal: Well-proportioned cabinets create a harmonious look that flatters your kitchen. Increased Safety: Proper distancing from the stove minimizes fire hazards and cooking-related accidents. Installation Best Practices Consulting with a professional during installation can lead to the best results. They will provide guidance on ensuring the correct height, factoring in the specific elements of your kitchen space. Remember, kitchen renovations can be complex, but small considerations like cabinet height make a big difference in the end. Conclusion Incorporating these factors when determining your kitchen cabinet heights can help you create a space that is not only functional but also beautiful. Thoughtful design choices combined with practical insights can transform your kitchen into a place that feels modern and accessible. Ready to remodel your kitchen? Whether DIY or with professional help, ensuring the proper cabinet height will lead to a successful kitchen renovation.

10.11.2025

Shower Cabins: The Secret to an Elevated Bathroom Experience

Update Elevate Your Hygiene Routine With Shower CabinsTransforming your bathroom into a sanctuary of functionality and relaxation is a goal for many homeowners. With an increasing desire for spaces that provide more than just basic utility, shower cabins have emerged as a leading choice. Blending luxury with convenience, these innovative units promise to not only streamline your bathing routine but also enhance your overall bathroom experience.Why Shower Cabins Are a Smart ChoiceShower cabins have become synonymous with modern bathroom design, thanks to their sleek glass panels and advanced technology. Imagine yourself stepping into a cabin that feels like a personal spa, equipped with hydro massage jets and customizable lighting options. The benefits extend beyond aesthetics; these cabins are designed for efficiency, helping conserve water while maximizing space.Creating the Perfect Spa-Like AtmosphereWhat could be more rejuvenating than a shower that feels like a luxurious spa treatment? Many modern shower cabins offer features aimed at creating an unparalleled relaxing experience. From steam jets that wrap you in warmth to digital controls that allow for precise temperature settings, you can craft the ideal environment in your own home. According to designs showcased by companies like MAAX, simple installation coupled with state-of-the-art features can turn your daily hygiene routine into an extraordinary ritual.Space Efficiency Without CompromiseShower cabins are perfect for maximizing limited bathroom spaces. Whether you’re dealing with a small apartment or an expansive family home, the adaptability of shower cabins allows for efficient use of valuable square footage. Designs come in various shapes, including semi-circular and square interiors, blending seamlessly with your existing layout while adding a touch of modern elegance. This innovative approach to space management can liberate you from clutter, enabling a cleaner, more organized bathroom.Amplifying Aesthetic AppealEvery homeowner seeks to enhance their living space, and shower cabins serve as stunning focal points in any bathroom. Whether you prefer a minimalist chic design with frameless glass or a more opulent look featuring colored LED lights, the options are virtually limitless. The aesthetic versatility means there’s something for everyone, allowing you to create a bathroom that reflects your personal style. Many modern designs even incorporate built-in music systems, transforming your shower into a complete sensory experience.A Promising Future for Bathroom DesignAs technology continues to evolve, so do shower cabins. The integration of smart technology allows for features previously only available in high-end spas. Homeowners today can expect to find options with programmable settings that enhance convenience and comfort. For example, digital control panels can be set to your preferred water temperature, steam intensity, and even lighting, making each shower a personalized experience.Incorporating Shower Cabins in Home RenovationsWhen planning a bathroom renovation, consider the impact a shower cabin can have on not just the room but also your lifestyle. Families may find that these installations significantly increase safety and ease of access in the bathroom, especially for elderly or disabled members. Similarly, parents can enjoy peace of mind knowing their children have a safe space for bathing. The design and installation of a shower cabin can create a more functional, attractive, and enjoyable space for your family.Final Thoughts and Call to ActionIn short, investing in a shower cabin is about more than just upgrading an appliance; it’s about enhancing your quality of life. With features that cater to both relaxation and spatial efficiency, they offer numerous benefits for every household. As you consider your next home improvement project, think about how a shower cabin could change your bathroom experience for the better. So, why wait? Dive into the world of shower cabins today!

Terms of Service

Privacy Policy

Core Modal Title

Sorry, no results found

You Might Find These Articles Interesting

T
Please Check Your Email
We Will Be Following Up Shortly
*
*
*